Waar vind je certificaten op je PC
Ik begin even met de basis Als u toepassingen gaat ontwikkelen die certificaten vereisen, zult u moeten weten waar de certificaten worden opgeslagen, evenals hoe te om de beheersinterface te navigeren. Er is een MMC (Microsoft Management Console) op elke pc aanwezig. Vanuit deze management console kunt u certificaten beheren. Certificaten kunnen opgeslagen worden worden onder Gebruikers Account of op de lokale Machine Opslag.
Voer de volgende stappen uit om Certificaten te laden uit de lokale computer account. Certificaten Management Console Openen.
1. Start à Uitvoeren
2. MMC
3. Bestand à Module Toevoegen / Verwijderen
4. Toevoegen
5. Certificaten
6. Computeraccount
7. De lokale PC waar deze wordt op uitgevoerd. à Voltooien
Je kunt de certificaten management console opslaan. Dit doe je op de volgende manier.
Bestand à Opslaan Als à Noem het certificaten.msc.
Sla het bestand bijvoorbeeld op je Desktop.
Als je Certificaten uit klikt (Lokale Gebruiker, Lokale Computer). Dan zie je certificaten opslagen
Personal. Here you store certificates for which you have the associated private key.
Trusted Root Certification Authorities. This store lists the Third-Party Root Certification Authorities (Thawte, Verisign, etc.), Microsoft root certificates, and your own root certificates for self-signed certificates.
Trusted People. Here you place your trusted certificates (you must also trust the entire chain of certificates).
Hoe kan ik mijn eigen test ssl certificaten aan maken voor websites of voor overige web diensten om het te beveiliging.
Dit is de meest gevraagde vraag die ik heb gehoord. Het is niet altijd gemakkelijk om een beknopte lijst van stappen te vinden om voor het creëren van certificaten te volgen. Er zijn drie populaire benaderingen van het produceren van certificaten voor testende doeleinden:
1. Vraag een testcertificaat bij een certificaatgezag (CA), zoals Verisign. Deze zijn meestal 90 dagen geldig.
2. Verstrek CA. uw eigen certificaten van uw Server 2003 Certificaat Server.
http://www.petri.co.il/install_windows_server_2003_ca.htm
http://www.petri.co.il/obtain_digital_certificate_from_online_ca.htm
3. Produceer certificaten gebruikend makecert.exe.
4. Maak een Self-Signed Certificate gebruik makend van de SSL Diagnostics Tool
Het makkelijkste is makecert.exe te gebruiken. Dit hulpmiddel wordt geïnstalleerd tijdens de installatie van .NET Framework SDK (2.0 en 3.0 beide bevat makecert.exe).
MSDN verteld hoe u certificaat kunt maken (zie http://msdn2.microsoft.com/en-us/library/bfsktky3.aspx).
Het creëren van een SSL Certificaat
Om een Self-Signed SSL Certificate te creëren kunt u het volgende commando makecert.exe gebruiken.
makecert -r -pe -n "CN=www.wardvissers.nl" -b 01/01/2000 -e 01/12/2036 -eku 1.3.6.1.5.5.7.3.1 -ss my -sr localMachine -sky exchange -sp "Microsoft RSA SChannel Cryptographic Provider" -sy 12 c:localhost.cer
The subject name “localhost” makes it possible to browse without errors to http://localhost or any path relative to it. The subject name of the SSL certificate must match the domain or machine name used in the path to access the site. If you used your machine name to browse to Web sites on your machine, for example http://idesign/, you’d create the certificate with the subject name “CN=idesign”. Best use is enter de FQDN like: webmail.wardvissers.nl
makecert.exe opties
Hier onder staat een lijst met opties om een goede Self-Signed SSL Certificaten te maken.
|
Option |
Description |
|
-n certName |
The subject name for the certificate. This is a distinguished name following the X.500 specification. It can be as simple as “CN=localhost” or include a richer description of the subject with “CN=localhost, O=IDesign, OU=Architecture, E=mlb@idesign.net”. |
|
-pe |
This allows the private key to be exported after generating it. It is a good idea to generate the private key pair and export the certificate to apply password protection, even if it is a test certificate. |
|
-sr |
Certificate store location where the key will be generated. It doesn’t matter which store you choose, because you will likely export the key pair, password protect it, and then import it to the correct store for use. Values can be currentuser or localmachine. |
|
-ss |
Which logical store will the certificate be installed in? Specify “My” here; this will place it in the Personal logical store. |
|
-sp |
The cryptography provider to use. A list of possible providers can be found here: http://windowssdk.msdn.microsoft.com/en-us/library/ms731160.aspx. The “Microsoft RSA SChannel Cryptographic Provider” is not subject to government restrictions for usage. |
|
-sy |
Cryptography provider type; an integer representative of the provider setting for the -sp option. Use the value 12 for the “Microsoft RSA SChannel Cryptographic Provider”. |
|
-r |
Indicates a self-signed certificate. |
|
-sky certType |
Can be signature or exchange. Use exchange for SSL and secure messaging. |
Het uitvoeren van het Certificaat
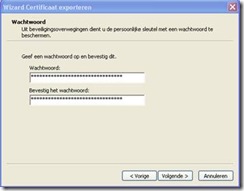
De bedoeling is om .pfx (Certificaat + Wachtwoord) en een cer op te slaan voor later gebruik.
De .cer heb je al opgeslagen tijdens het aanmaken van het certificaat.
Via de Certificaten console kun je .pfx bestand exporteren.
Hoe je dat doet zie je hieronder:
RechterMuis op het Certificaat en dan Alle Taken à Exporteren


