MDT 2010 Automatically Move Computers to the Right OU

When I deploy client computers you have always 2 client Tasks. One for Laptops and one for Desktops.
I already blogd about joing domain. Jou can find it here. http://www.wardvissers.nl/2009/12/20/mdt-2010-join-domain/.

I had a issue joining the computers to the right ou for the two tasks.

I found a great solution to fix it.

Here is how I did it.

Open the right Task Sequence. I my case it was laptop.

This is de default setting
image

Change this to: Gather local data and proces rules. Fill at Rules files customsettings.ini in.
image

Open Customsettings.ini

Change the following

[Settings]
Priority=Default
Properties=MyCustomProperty

to

[Settings]
Priority=TaskSequenceID, Default
Properties=MyCustomProperty

Add the following text.

[LAPTOP]
MachineObjectOU=ou=laptops,ou=ward,dc=wardvissers,dc=local

You can do this also for Desktops.

When you deploy a new computer the computer is now in the right OU.  I love MDT Open-mouthed smile

Removing the Browser Choice option During deployment with MDT 2010

The Deployment Guys created a nice script to remove the Browser Choice option.

If you are in the European Union, you will have seen the installation of the Browser Choice option from Windows Update. This is a good thing if you are a consumer, however if you are managing Volume Licensed (VL) builds and you don’t want the Browser Choice in your deployment image.
But you do want to make use of the MDT 2010 ability to go off to Windows Update or your WSUS Server and install patches automatically during your deployment task sequence.

Check HERE how to config MDT to use your WSUS server

MDT 2010 comes with a number of task sequence templates. The one I used many times is the standard client task sequence template. As part of this template there are two tasks for applying Windows updates (Pre-Application Installation and Post-Application Installation).
These tasks are really useful as part of the deployment of a client machine because you have always an up to date image.

TS

As part of this automated Windows Update process KB976002 will be downloaded and installed giving the options shown below in your core image.

image

Recently KB2019411 has been released which provides information about the Browser Choice update for system administrators who are in managed environments that are under a Volume Licensing program . De Deploymentsguys have created a MDT based script for implementing the suggestions in the article KB2019411. Adding the registry entries to control the display of the Browser Choice screen and to remove the Browser Choice icon from the desktop.

The script (CFG-HideBrowserChoice.wsf) should be placed in the MDT Distribution Share\Scripts folder and then a “Run Command Line” task should be added to your image engineering task sequence (after the last Windows Update task but before the sysprep and image capture tasks). The command you should run is cscript.exe CFG-HideBrowserChoice.wsf.

An example of this is shown below.

ts2

When the task runs, the script will turn off the Browser Choice and removes the icon from the desktop. You will also find a log file that the script generates in the usual MDT log location (MININT\SMSOSD\OSDLOGS\CFG-HideBrowserChoice.log)

You can get the CFG-HideBrowserChoice.wsf script from the Deployment Guys SkyDrive by clicking HERE

Tested and I worked great

Source: blogs.technet.com

MDT 2010 Multiple Partitions Issues & hidden Bitlocker partition

I had a new laptop where I wanted to deploy Windows 7 x64 Enterprise and walked to a bug in MDT 2010. Default config.

I configured 2 partitions to use the whole disk. See screenshot.
imageimage
When I deploy the task I get the following error

IMAG0003
He wants to format partition D. But partition D is not availably. 
I ended the task and opened the PE window and started Diskpart and listed the volumes.

IMAG0001

The strange thing was that the extended partition has the drive letter S had and it was a raw partition.

After studying ZTIDiskpart.log (X:\MININT\SMSOSD\OSDLOGS\ZTIDiskpart_diskpart.log)

I found out that there was no space left to create a 300mb partition for saving Bitlocker information.

So what did ZTIDiskpart.wsf. ZTIDiskpart.wsf gave the last partition that was created the drive letter S. This is the default letter for the Bitlocker partition. So hey wanted to format the file system with fat32. Because in my case the partition size was 200GB he cannot format the disk.

Solution:

Setting the extended partition to use 95%. Then MDT have enough space to create a 300mb hidden partition for Bitlocker.

image image

MDT 2010 Importing automatically the right driver

Microsoft Deployment Toolkit 2010 has some nice improvements to handle drivers. I will describe how I like to manage drivers in MDT 2010.

Some time I wrote i article about how to get the Name & Model from a computer. This is very important when you want to import only the right drivers automatically.

First we have to build the ‘Out-of-Box Drivers’ folder structure and import drivers. I have subdirectories for each architecture, brand and model.  This is what my folder tree looks like:

MDT 2010 - Out-of-Box Drivers

However, you can build your own structure, as long as you respect the proper model & brand (make) name of the vendors.

Build Out-of-Box Drivers tree

To build up the folder structure you have to know the model name of your hardware. To retrieve the proper computer name execute at powershell command prompt: ‘Get-WmiObject -Class win32_computersystemproduct | fl Name,Model,UUID,Identifyingnumber,Vendor’, to get the exact name WMI queries to determine the computer model. In my case the computer name is “Latitude D830”.

Now that we have drivers imported in our Deployment Share, it’s time to move on.

1. DriverGroups

DriverGroups existed in MDT 2008 already, although the MDT Team added subdirectory support in MDT 2010.

At deployment phase MDT uses WMI to query the proper computer model and only the current model drivers will be injected. In order to get this working properly, you have to use the EXACT model name in your Out-of-Box Driver tree.

Inject the correct drivers in your Task Sequence

Add a new step in your Task Sequence to inject the correct drivers. MDT will query the computer name and inject the drivers which corresponds with the computer name from the Out-of-Box folder structure, right before applying the image at deployment.

MDT 2010 - Set Task Sequence Variable (Add Task) MDT 2010 - Set Task Sequence Variable (DriverGroup)

I use ‘DriverGroup_001’ as Task Sequence Variable, and Win7×64\%Make%\%Model% as value for my Windows 7 x64. You have to adapt this to your Out-of-Box tree.

MDT 2010 - Set Task Sequence Variable

As I use a DriverGroup I’ve disabled the ‘Inject Drivers’ task.

Customsettings.ini

As my Task Sequence handles everything, there isn’t anything needed here.

If you don’t like to use a new Task in your TS, you can add DriverGroup variables in customsettings.ini like this:

DriverGroup_001=%Make%\%Model%

DriverGroup_002=Printers

2. Selection Profiles

New in MDT 2010 are DriverSelectionProfiles. These are easy for new MDT admins, very straight forward and easy to use.

Overview:

MDT 2010 - Selection Profiles Overview

First you have to create a Profile (or use one of the default profiles):

MDT 2010 - Selection Profiles, select folders

You can even select Packages and Applications, use it for “bad drivers” aka driver setup packs.

Select what drivers you want to add to the profile;

MDT 2010 - Selection Profiles, add profile

After making the profiles you can use them in your Task Sequences. The default ‘Inject Drivers’ settings are on the left, the customized one on the right:

MDT 2010 - Selection Profiles, task sequence MDT 2010 - Selection Profiles, task sequence

You can add  Selection Profiles for drivers/packages or whatever you want. Just add an extra step in your task sequence like above.

Customsettings.ini

As with DriverGroups you can choose to handle the DriverSelectionProfile in customsettings.ini or in your TS.

Example:

DriverSelectionProfile=Dell Latitude D520 x64

Microsoft Deployment Toolkit (MDT) 2010 Update 1 is RTM

Microsoft has released a new version of MDT 2010 named Update 1.

It’s a great tool im loving it.

What new:

For System Center Configuration Manager 2007 users:

  • New “User Driven Installation” deployment method. An easy-to-use UDI Wizard allows users to initiate and customize an OS deployment on their PCs that’s tailored to their individual needs.

  • Support for Configuration Manager R3 “Prestaged Media.” For those deploying Windows 7 and Office 2010 along with new PCs, a custom OS image can easily be loaded in the factory and then customized once deployed.

For Lite Touch Installation:

  • Support for Office 2010. Easily configure Office 2010 installation and deployment settings through the Deployment Workbench and integration with the Office Customization Tool.
  • Improved driver importing. All drivers are inspected during the import process to accurately determine what platforms they really support, avoiding common inaccuracies that can cause deployment issues.

Bug Fixes and small improvements

  • LTI Wizard performance improvement. The LTI Wizard now takes less time to initialize and shows up faster.
  • Issue in validating connection to the server fixed. In a few scenarios, MDT 2010 used to report the error message, "A connection to the distribution share could not be made" when a task sequence is run. The Microsoft Support article, “Error message when you use MDT 2010: ‘Multiple connections to a server or shared resource by the same user, using more than one user name, are not allowed,’” at http://support.microsoft.com/kb/977566 describes this issue in detail. This issue has been fixed in MDT 2010 Update 1.
  • Support for installing Windows 7 roles and features. MDT 2010 Update 1 adds support for installation of Windows 7 operating system roles and features.
  • Looping issue with x64 custom Windows images fixed. In MDT 2010, ZTI–System Center Configuration Manager deployments could get into an infinite loop when deploying an x64 Windows image captured by LTI. This issue has been fixed in MDT 2010 Update 1
  • Error handling improvements in MDT task sequence templates. In MDT 2010, task sequences appear to finish successfully even when they really failed. These issues are fixed in MDT 2010 Update 1.

Download the new version HERE 😀

Deploy Office 2010 with Multiple Languages with MDT 2010

I Like Office 2010. For me it is the best Office version i ever worked with.
MDT 2010 it’s great tool that Microsoft created.
Now i will talk about how you deploy Office 2010 with Multilanguage packs with MDT 2010.

Step 1: Download the Office 2010 English version booth will be in x86 & x64

Step 2. Download the Office 2010 (language) Multilanguage iso only available from the Microsoft Volume Licensing site. Both in x86 en x64.

Step 3. Add the Office 2010 English version to MDT 2010 here office-2010-uitrollen-met-mdt-2010

Step 4. Extract the Office 2010 (language) Multilanguage iso with 7zip in the same application folder witch you created in Step 3.

Step 5. When you open MDT 2010 management console and you go to the Office 2010 Application that you added in step 3. You wil see that MDT sees more the one language. In my case it was en-us and nl-nl. The Screenshot is from the older MDT 2010 you MDT sees Office 2010 as Office 2007. MDT 2010 beta 1 supports Office 2010. I found till now no issues deploying Office 2010.

 image

Step 6. Check the languages that you want. Check the Screenshot how i did it.

Step 7. Deploy the a Windows XP or Windows 7 client with Office 2010 Multilanguage versions.

Step 8. You can check with Microsoft Office 2010 Language Preferences or the languages that you configured are installed.
image

Step 9. Use Group Policy to set the language settings for users

    1. Download the Office 2010 policy template files to your computer. You will find them HERE

    2. Make a new GPO named Office 2010 languages settings it is a user policy.

    3. Under User Configuration in the console tree, right-click Administrative Templates.

    4. Click Add/Remove Templates, and then click Add.

    5. In the Policy Templates dialog box, click the template that you want to add, and then click Open.

    6. After you add the Office 2010 templates, click Close.

    7. Open the Group Policy object (GPO) for which you want to set policy.

    8. Double-click User Configuration and expand the tree under Administrative Templates.

    9. Locate language-related policies in the Microsoft Office 2010 \ Language Settings node.

    10. Select the languages that you want to use for each setting.

    11. Save the GPO.

    12. Go Testing

    Where to find the right MDT 2010 logs

    Each MDT 2010 script automatically creates log files during its execution. The names of these log files match the name of the script—for example, ZTIGather.wsf creates a log file named ZTIGather.log. Each script also updates a common master log file (BDD.log) that aggregates the contents of the log files that MDT 2010 scripts create. MDT 2010 log files reside in C:\MININT\SMSOSD\OSDLOGS during the deployment process. Depending on the type of deployment being conducted, the log files are moved at the completion of the deployment to either %WINDIR%\SMSOSD or %WINDIR%\TEMP\SMSOSD. For Lite Touch Installation (LTI) deployments, the logs start in C:\MININT\SMSOSD\OSDLogs. They end up in %WINDIR%\TEMP\DeploymentLogs when task sequence execution is complete.

    MDT 2010 creates the following log files:

    BDD.log: This is the aggregated MDT 2010 log file that is copied to a network location at the end of the deployment if you specify the SLShare property in the Customsettings.ini file.

    LiteTouch.log: This file is created during LTI deployments. It resides in %WINDIR%\TEMP\DeploymentLogs unless you specify the /debug:true option.

    Scriptname.log: This file is created by each MDT 2010 script. Scriptname represents the name of the script in question.

    SMSTS.log: This file is created by the Task Sequencer and describes all Task Sequencer transactions. Depending on the deployment scenario, it may reside in %TEMP%, %WINDIR%\System32\ccm\logs, or C:\_SMSTaskSequence, or C:\SMSTSLog.

    Wizard.log: The deployment wizards create and update this file. 

    WPEinit.log: This file is created during the Windows PE initialization process and is useful for troubleshooting errors encountered while starting Windows PE.

    DeploymentWorkbench_id.log: This log file is created in the %temp% folder when you specify a /debug when starting the Deployment Workbench.

    MDT 2010 Update 1 Beta Released

    The Solution Accelerators Team have released Microsoft Deployment Toolkit 2010 Update 1 Beta and would like your feedback.

    Download the beta now at https://connect.microsoft.com/site14/Downloads/DownloadDetails.aspx?DownloadID=8689

    MDT 2010 Update 1 provides new capabilities, such as:

    · Support for Microsoft Office 2010.

    · A new User-driven Installation (UDI) deployment method (formerly known as “Modena”) for Microsoft System Center Configuration Manager 2007. UDI gives information technology (IT) staff control over the deployment experience while empowering users to interact with and customize their operating system deployment through an easy-to-use wizard.

    · Improvements to the Deployment Workbench driver import process, detecting each driver’s true supported platforms.

    · Many bug fixes and other small improvements.

    This release supports the deployment of the Windows® 7; Windows Vista®; Windows XP; Windows Server® 2008 R2; Windows Server 2008; and Windows Server 2003 operating systems. See the Microsoft Deployment Toolkit Documentation Library, which is included with MDT 2010 Update 1, for the complete documentation for this release.

    Defrag your Virtual Machines (VMs’)

    Just like any other operating system, over time, a disk will become fragmented. Virtual machines are no different. The time that it takes for a disk to become fragmented depends on what data is being added to and removed from the virtual machine hard drive.

    Why use MyDefrag instead of the standard Windows defragger?

    • Much faster.
    • Totally automatic, extremely easy to use.
    • Optimized for daily use.
    • Disk optimization, several strategies.
    • Directories are placed together.
    • Reclaims NTFS reserved areas after disk-full.
    • Maintains free spaces for temporary files.
    • Can defragment very full harddisks.
    • Can defragment very large files.
    • Can defragment individual directories and files.
    • Can be run automatically with the Windows Scheduler.
    • Can be used from the commandline.
    • Can be used as a screen saver.
    • Can be run from cdrom or memory stick.
    • Script language, can be customized.
    • Better voor VCB, VDR, DPM & Snapshots.

    When you run MyDeFrag.exe with /verysilent it detect automatically the OS and then install x86 or x64 version from MyDefrag. It’s always installed at c:\program files. You can deploy it with MDT 2010 automatically when installing the OS. Or run it from a network share.

    You can use Group Policy Preferences to schedule it. 
    image

    Restore an Windows 7 Capture with MDT 2010

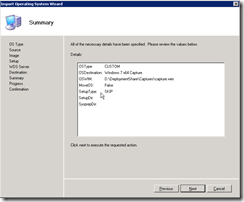
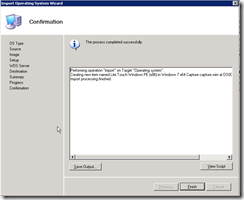
    Step1: Import the Capture Image.

    You can find the capture file at  \\server\deploymentshare$\Capture or x:\deploymentshare\capture.

    image image
    If you have already imported Windows 7 DVD.
    You can chose for Sysprep and Setup files are not needed. The Setup will copy them automatically when de Capture wil be deployed. 
    image image
    image  image

    Step 2. Create a Normal Client Task with the OS Capture that you imported.

    Translate »