Updated ouut-of-band (OOB) updates are released for March 2024 for Windows Server Domain Controllers

Microsoft has identified an issue that affects Windows Server domain controllers (DCs), and has expedited a resolution that can be applied to affected devices. Out-of-band (OOB) updates have been released for some versions of Windows today, March 22, 2024, to addresses this issue related to a memory leak in the Local Security Authority Subsystem Service (LSASS). This occurs when on-premises and cloud-based Active Directory domain controllers service Kerberos authentication requests.

This issue is not expected to impact Home users, as it is only observed in some versions of Windows Server. Domain controllers are not commonly used in personal and home devices.

Updates are available on the Microsoft Update Catalog only. These are cumulative updates, so you do not need to apply any previous update before installing them, and they supersede all previous updates for affected versions. If your organization uses the affected server platforms as DCs and you haven’t deployed the March 2024 security updated yet, we recommend you apply this OOB update instead. For more information and instructions on how to install this update on your device, consult the below resources for your version of Windows:

  • Windows Server 2022KB5037422
  • Windows Server 2019: Available soon
  • Windows Server 2016KB5037423
  • Windows Server 2012 R2KB5037426

Note: The OOB release for Windows Server 2019 will be released in near term.

Windows Server 2025 “Preview” deployment with Packer

As Windows Server 2025 Preview is officially released, I wanted to test a  automated build of the Windows Server 2025 Preview release. So that I can deploy this in my home lab and going to test the new features if I can find the time….

About Hashicorp Packer

Hashicorp Packer is a self-contained executable producing quick and easy operating system builds across multiple platforms. Using Packer and a couple of HCL2 files, you can quickly create fully automated template(s) with latest Windows Updates en VMware Tools. When you schedule a fresh builds after patch Tuesday  you have always an up-to-date and fully secured template.

When using VMware customization tools. You can spin up vm’s in minutes.

Automated Windows Server 2025 “Preview” Build

Files you need?
The files and versions I am using at the time of this writing are as follows:

Outside of downloading both Packer and Windows Server 2022 Preview build, you will need the following files:

  • windowsserver2025.auto.pkrvars.hcl – houses the variable values you want to define.
  • windows2025.json.pkr.hcl – the Packer build file
  • Answer file – Generated with Windows System Image Manager (SIM) you can download the file below
  • Custom script file(s) – optional

Other considerations and tasks you will need to complete:

  • Copy the Windows Server 2025 ISO file to a vSphere datastore

Windows Server 2025 unattend Answer file for the automated Packer Build

Like other automated approaches to installing Windows Server, the automated Windows Server 2025 Packer build requires an answer file to provide answers to the GUI automatically and other installation prompts that you normally see in a manual installation of Windows Server.

You will find the scripts here: https://github.com/WardVissers/Packer-Win2025

The only problem that I had was: Switching from Nic from Public to Private

# Set network connections profile to Private mode.

Write-Output ‘Setting the network connection profiles to Private…’

do {

    $connectionProfile = Get-NetConnectionProfile

    Start-Sleep -Seconds 10

} while ($connectionProfile.Name -eq ‘Identifying…’)

Set-NetConnectionProfile -Name $connectionProfile.Name -NetworkCategory Private

VCF 5.0 running inside Nested ESXi server with only 64GB Memory

So I interested to trying to deploy latest release of VMware Cloud Foundation (VCF) 5.0 on my Windows 11 Home PC witch have 128GB and 16 core intel cpu.

William Lee wrote a nice artikel about VMware Cloud Foundation 5.0 running on Intel NUC

Disclaimer: This is not officially supported by VMware, please use at your own risk.

Requirements:

  • VMware Cloud Builder 5.0 OVA (Build 21822418)
  • VCF 5.0 Licenses Through VMUG ADVANTAGE
  • Home PC (Not Special Hardware)
    – 128GB Memory
    – Intel 12600 CPU
    – 4TB of NVME Storage
  • Windows 11 with VMware Workstation 17

Setup

Virtual Machines

  • DC02 (Domain Controller, DNS Server) (4GB 2vcpu)
  • VCF-M01-ESX01 (ESXi 8.0 Update 1a) (64GBGB 1x140GB 2x600NVME 2x NIC) (Every Thin Provisiond)
  • VCF-M01-CB01 (4GB and 4CPU) Only needed through First Deploment

Network settings on my PC

  • 1 IP In my home network
  • 172.16.12.1 (To Fool Cloudbuilder)
  • 172.16.13.1 (To Fool Cloudbuilder)

Procedure:

Install en Configure ESXi

Step 1 – Boot up the ESXi installer from de iso mount and then perform a standard ESXi installation.

Step 2 – Once ESXi is up and running, you will need to minimally configure networking along with an FQDN (ensure proper DNS resolution), NTP and specify which SSD should be used for the vSAN capacity drive. You can use the DCUI to setup the initial networking but recommend switching to ESXi Shell afterwards and finish the require preparations steps as demonstrated in the following ESXCLI commands:

esxcli system ntp set -e true -s pool.ntp.org
esxcli system hostname set –fqdn vcf-m01-esx01.wardvissers.nl

Note: Use vdq -q command to query for the available disks for use with vSAN and ensure there are no partitions residing on the 600GB disks.
Don’t change time server pool.ntp.org.

To ensure that the self-signed TLS certificate that ESXi generates matches that of the FQDN that you had configured, we will need to regenerate the certificate and restart hostd for the changes to go into effect by running the following commands within ESXi Shell:

/bin/generate-certificates
/etc/init.d/hostd restart

Cloudbuilder Config

Step 3 – Deploy the VMware Cloud builder in a separate environment and wait for it to be accessible over the browser. Once CB is online, download the setup_vmware_cloud_builder_for_one_node_management_domain.sh setup script and transfer that to the CB system using the admin user account (root is disabled by default).

Step 4 – Switch to the root user and set the script to have the executable permission and run the script as shown below

su –
chmod +x setup_vmware_cloud_builder_for_one_node_management_domain.sh
./setup_vmware_cloud_builder_for_one_node_management_domain.sh

The script will take some time, especially as it converts the NSX OVA->OVF->OVA and if everything was configured successfully, you should see the same output as the screenshot above.

A screenshot of a computer

Description automatically generated

Step 4 – Download the example JSON deployment file vcf50-management-domain-example.json and and adjust the values based on your environment. In addition to changing the hostname/IP Addresses you will also need to replace all the FILL_ME_IN_VCF_*_LICENSE_KEY with valid VCF 5.0 license keys.

Step 5 – The VMnic in the Cloud Builder VM will acked als a 10GB NIC so I started the deployment not through powershell but normal way in Cloud Builder GUI.

Your deployment time will vary based on your physical resources but it should eventually complete with everything show success as shown in the screenshot below. (I have one retry for finish)
A screenshot of a computer

Description automatically generated A screenshot of a cloud support

Description automatically generated
Here are some screenshots VCF 5.0 deployment running on my home PC.

A screenshot of a computer

Description automatically generated

A screenshot of a computer

Description automatically generated

Problems

Check this if you have problems logging in NSX:
https://www.wardvissers.nl/2023/07/26/nsx-endless-spinning-blue-cirle-after-login/

Next Steps.

1. Reploy with use of the Holo-Router https://core.vmware.com/resource/holo-toolkit-20-deploy-router#deploy-holo-router

2. Testing if can deploy Single Host VCF Workload Domain, on same way by following this blog post HERE! 😁
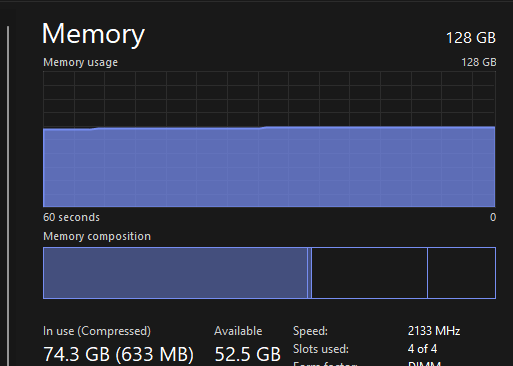
A screenshot of a computer

Description automatically generated

If I can start another 64GB ESXi Server.

VMware Cloud Foundation 5.0 is Here

The VMware Cloud Foundation team is pleased to announce the availability of VMware Cloud Foundation 5.0

Waiting for VMUG Advantive to be updatet & Finding the time to test it out.

Virtual Machine with Windows Server 2022 with KB5022842 (Feb 2023) installed and configured with secure boot will not boot up on vSphere 7 unless updated to 7.0u3k (vSphere 8 not affected)

Virtual Machine with Windows Server 2022 with KB5022842 (Feb 2023) installed en configured with secure boot enabled will not boot up on vSphere 7 unless updated to 7.0u3k (vSphere 8 not affected)

VMware Seciroty Violation message

In VM vmware.log, there is ‘Image DENIED’ info like the below:
2023-02-15T05:34:31.379Z In(05) vcpu-0 – SECUREBOOT: Signature: 0 in db, 0 in dbx, 1 unrecognized, 0 unsupported alg.
2023-02-15T05:34:31.379Z In(05) vcpu-0 – Hash: 0 in db, 0 in dbx.
2023-02-15T05:34:31.379Z In(05) vcpu-0 – SECUREBOOT: Image DENIED.

To identify the location of vmware.log files:

  1. Establish an SSH session to your host. For ESXi hosts
  2. Log in to the ESXi Host CLI using root account.
  3. To list the locations of the configuration files for the virtual machines registered on the host, run the below command:

#vim-cmd vmsvc/getallvms | grep -i “VM_Name

  1. The vmware.log file is located in virtual machine folder along with the vmx file.
  2. Record the location of the .vmx configuration file for the virtual machine you are troubleshooting. For example:

/vmfs/volumes/xxxxxxxx-xxxxxxx-c1d2-111122223333/vm1/vm1.vmx
/vmfs/volumes/xxxxxxxx-xxxxxxx-c1d2-111122223333/vm1/vmware.log

Resolution

This issue is resolved in VMware ESXi 7.0 U3k, released on February 21st 2023. Build 21313628
A screenshot of a computer

Description automatically generated with medium confidence
Notes:

  • Virtual machines running on any version of vSphere ESXi 8.0.x are not impacted by this issue
  • vSphere ESXi 6.7 is End of general Support. For more information, see The End of General Support for vSphere 6.5 and vSphere 6.7 is October 15, 2022.
  • If you already face the issue, after patching the host to ESXi 7.0 Update 3k, just power on the affected Windows Server 2022 VMs. After you patch a host to ESXi 7.0 Update 3k, you can migrate a running Windows Server 2022 VM from a host of version earlier than ESXi 7.0 Update 3k, install KB5022842, and the VM boots properly without any additional steps required.

SD Card Boot issue Solution in ESXi 7.x

Issue The host goes into an un-responsive state due to: “Bootbank cannot be found at path ‘/bootbank” and boot device is in an APD state.

This issue is seen due to the boot device failing to respond & enter APD state (All paths down). Some cases, Host goes to non-responsive state & shows disconnected from vCenter.

As of 7.0 Update 1, the format of the ESX-OSData boot data partition has been changed. Instead of using FAT it is using a new format called VMFS-L. This new format allows much more and faster I/O to the partition. The level of read and write traffic is overwhelming and corrupting many less capable SD cards.

The action plan for future resolution would be to replace the SD card/s with a capable device/disk. Per the best practices mentioned on Installation guide.

The version 7.0 Update 2 VMware ESXi Installation and Setup Guide, page 19, specifically says “As even read-only workloads can cause problems on low-end flash devices, you should install ESXi only on high-endurance flash media“.

https://docs.vmware.com/en/VMware-vSphere/7.0/vsphere-esxi-702-installation-setup-guide.pdf

You can also refer to the below KB:

Reference: https://kb.vmware.com/s/article/83376?lang=en_US

Resolution

VMware engineering has a fix that will be in the next release.  Planned for July 2021.

https://communities.vmware.com/t5/ESXi-Discussions/SD-Boot-issue-Solution-in-7-x/m-p/2852027

https://www.provirtualzone.com/vsphere-7-update-2-loses-connection-with-sd-cards-workaround/

Upcoming change (March 2020) – Microsoft to disable use of unsigned LDAP port 389

In March 2020, Microsoft is going to release a update which will essentially disable the use of unsigned LDAP which will be the default. This means that you can no longer use bindings or services which binds to domain controllers over unsigned ldap on port 389. You can either use LDAPS over port 636 or using StartTLS on port 389 but it still requires that you addd a certificate to your domain controllers. This hardening can be done manually until the release of the security update that will enable these settings by default.

How to add signed LDAPS to your domain controllers

You can read more about the specific change here –> https://support.microsoft.com/en-us/help/4520412/2020-ldap-channel-binding-and-ldap-signing-requirement-for-windows you can also read more here –> https://techcommunity.microsoft.com/t5/core-infrastructure-and-security/ldap-channel-binding-and-ldap-signing-requirements-update-now/ba-p/921536

After the change the following features will be supported against Active Directory.

clipboard_image_0.png

How will this affect my enviroment?

Clients that rely on unsigned SASL (Negotiate, Kerberos, NTLM, or Digest) LDAP binds or on LDAP simple binds over a non-SSL/TLS connection stop working after you make this configuration change. This also applies for 3.party solutions which rely on LDAP such as Citrix NetScaler/ADC or other Network appliances, Vault and or authentication mechanisms also rely on LDAP. If you haven’t fixed this it will stop working. This update will apply for all versions.

Windows Server 2008 SP2,
Windows 7 SP1,
Windows Server 2008 R2 SP1,
Windows Server 2012,
Windows 8.1,
Windows Server 2012 R2,
Windows 10 1507,
Windows Server 2016,
Windows 10 1607,
Windows 10 1703,
Windows 10 1709,
Windows 10 1803,
Windows 10 1809,
Windows Server 2019,
Windows 10 1903,
Windows 10 1909

How to check if something is using unsigned LDAP?

If the directory server is configured to reject unsigned SASL LDAP binds or LDAP simple binds over a non-SSL/TLS connection, the directory server will log a summary under eventid 2888 one time every 24 hours when such bind attempts occur. Microsoft advises administrators to enable LDAP channel binding and LDAP signing as soon as possible before March 2020 to find and fix any operating systems, applications or intermediate device compatibility issues in their environment.

You can also use this article to troubleshoot https://docs.microsoft.com/en-us/archive/blogs/russellt/identifying-clear-text-ldap-binds-to-your-dcs

Credits: https://msandbu.org/upcoming-change-microsoft-to-disable-use-of-unsigned-ldap-port-389/

VMware vSphere PowerCLI 11.0

VMware vSphere PowerCLI 11.0 New Features

New features available on  VMware vSphere PowerCLI 11.0 is to support the new all updates and release of VMware products , find the below following has been features,

  • New Security module
  • vSphere 6.7 Update 1
  • NSX-T 2.3
  • Horizon View 7.6
  • vCloud Director 9.5
  • Host Profiles – new cmdlets for interacting with
  • New Storage Module updates
  • NSX-T in VMware Cloud on AWS
  • Cloud module multiplatform support
  • Get-ErrorReport cmdlet has been updated
  • PCloud module has been removed
  • HA module has been removed

Now we will go through above mentioned new features to find what functionality it bring to PowerCLI 11.0

What is PowerCLI 11.0 New Security Module

The new security module brings more powerful automation features to PowerCLI 11.0 available  new cmdlets include the following

  • Get-SecurityInfo
  • Get-VTpm
  • Get-VTpmCertificate
  • Get-VTpmCSR
  • New-VTpm
  • Remove-VTpm
  • Set-VTpm
  • Unlock-VM

Also New-VM cmdlet has enhanced functionality with the security module functionality and it includes parameters like KmsCluster, StoragePolicy, SkipHardDisks etc which can be used while creating new virtual machines with PowerCLI .In addition to that  Set-VM, Set-VMHost, Set-HardDisk, and New-HardDisk cmdlets are added.

Host Profile Additions

There are few additions to the VMware.VimAutomation.Core module that will make managing host profiles from PowerCLI

  • Get-VMHostProfileUserConfiguration
  • Set-VMHostProfileUserConfiguration
  • Get-VMHostProfileStorageDeviceConfiguration
  • Set-VMHostProfileStorageDeviceConfiguration
  • Get-VMHostProfileImageCacheConfiguration
  • Set-VMHostProfileImageCacheConfiguration
  • Get-VMHostProfileVmPortGroupConfiguration
  • Set-VMHostProfileVmPortGroupConfiguration

Storage Module Updates

These new Storage Module updates specifically for VMware vSAN , the updates has predefined time ranges when using Get-VsanStat. In addition  Get-VsanDisk has additional new properites that are returned including capacity, used percentage, and reserved percentage. Following are the  cmdlets have been added to automate vSAN

  • Get-VsanObject
  • Get-VsanComponent
  • Get-VsanEvacuationPlan – provides information regarding bringing a host into maintenance mode and the impact of the operation on the data, movement, etc

Additionally  following modules have been removed

  • PCloud module
  • HA module

Download now and start using

Update-module VMware.Powercli

Useful Links

vSphere 6.7 Update 1 Ready for Download

VMware vSphere Hypervisor (ESXi) 6.7U1
2018-10-16
Go to Downloads

VMware vCenter Server 6.7U1
2018-10-16
Go to Downloads

VMware vRealize® Log Insight™ 4.6.1 for vCenter™
2018-06-05
Go to Downloads

VMware vSphere Replication 8.1.0.4
2018-08-24
Go to Downloads

VMware vRealize Orchestrator Appliance 7.5.0
2018-09-20
Go to Downloads

VMware vRealize Operations Manager 7.0
2018-09-20
Go to Downloads

VMware NSX for vSphere 6.4.3
2018-09-11
Go to Downloads

Microsoft Exchange Memory Corruption Vulnerability

A remote code execution vulnerability exists in Microsoft Exchange software when the software fails to properly handle objects in memory. An attacker who successfully exploited the vulnerability could run arbitrary code in the context of the System user. An attacker could then install programs; view, change, or delete data; or create new accounts.

Exploitation of the vulnerability requires that a specially crafted email be sent to a vulnerable Exchange server.

The security update addresses the vulnerability by correcting how Microsoft Exchange handles objects in memory.

Download:

Product Link
Microsoft Exchange Server 2010 Service Pack 3 Update Rollup 21

4091243

Microsoft Exchange Server 2013 Cumulative Update 19

4092041

Microsoft Exchange Server 2013 Cumulative Update 20

4092041

Microsoft Exchange Server 2013 Service Pack 1

4092041

Microsoft Exchange Server 2016 Cumulative Update 8

4092041

Microsoft Exchange Server 2016 Cumulative Update 9

4092041

Translate »