Restore an Windows 7 Capture with MDT 2010

Step1: Import the Capture Image.

You can find the capture file at  \\server\deploymentshare$\Capture or x:\deploymentshare\capture.

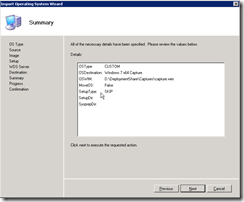
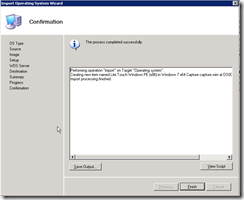
image image
If you have already imported Windows 7 DVD.
You can chose for Sysprep and Setup files are not needed. The Setup will copy them automatically when de Capture wil be deployed. 
image image
image  image

Step 2. Create a Normal Client Task with the OS Capture that you imported.

Capture an Existing Windows 7 install with MDT

You can With MDT capture an existing Windows 7 Install.
1. Creating the Task in MDT
2010-04-18_134159 2010-04-18_134127
Jou must Chose the OS version witch you want to capture.

2010-04-18_134151 2010-04-18_134213
2010-04-18_134231 2010-04-18_134317
2010-04-18_134327 2010-04-18_134336

2. Create a copy from the Customsettings.ini
    Edit the Customsettings.ini with de following text.

[Settings]
Priority=Default
Properties=MyCustomProperty

[Default]
OSInstall=Y
SkipAppsOnUpgrade=YES
SkipCapture=NO
SkipAdminPassword=YES
SkipProductKey=YES

4. Connect to the deployement share \\server\deploymentshare$ and go to the folder script and double click on LiteTouch.vbs
2010-04-15_162332 2010-04-15_162453

2010-04-15_1626352010-04-15_162645

2010-04-15_162659
4. Don’t forget after the Capture to restore the original customsettings.ini file.

Microsoft Assessment & Planning Toolkit

The Microsoft Assessment and Planning (MAP) Toolkit is an agentless toolkit that finds computers on a network and performs a detailed inventory of the computers using Windows Management Instrumentation (WMI) and the Remote Registry Service. The data and analysis provided by this toolkit can significantly simplify the planning process for migrating to Windows® 7, Windows Vista®, Microsoft Office 2007, Windows Server® 2008 R2, Windows Server 2008, Hyper-V, Microsoft Application Virtualization, Microsoft SQL Server 2008, and Forefront® Client Security and Network Access Protection. Assessments for Windows Server 2008 R2, Windows Server 2008, Windows 7, and Windows Vista include device driver availability as well as recommendations for hardware upgrades.

You can use MAP to inventory the following platforms:

  • Windows 7
  • Windows Vista
  • Windows XP® Professional
  • Windows Server 2008 or Windows Server 2008 R2
  • Windows Server 2003 or Windows Server 2003 R2
  • Windows 2000 Professional or Windows 2000 Server
  • VMware ESX
  • VMware ESXi
  • VMware Server

Reporting
– Identification of currently installed Windows client operating systems, their hardware, and recommendations for migration to Windows 7 and Windows Vista. The tool also reports if desktops have anti-virus and anti-malware programs installed and if the Windows Firewall is turned on.
– Identification of currently installed Windows Server operating systems, their hardware, and recommendations for migration to Windows Server 2008 R2 and Windows Server 2008.
– Identification of currently installed Microsoft Office software and recommendations for migration to Microsoft Office 2007.
– Detailed assessment and reporting of server utilization gathered using the Performance Metrics Wizard.
– Recommendations for server consolidation and virtual machine placement using Hyper-V
– Assessment of client machines, servers, and the technology environment for the implementation of Microsoft Application Virtualization (APP-V)
– Identification of machines where Microsoft SQL Server components are installed.
– Identification of virtual machines, their hosts, and details about each.
– Identification of Windows Server Roles

Hardware Requirements:
– Windows 2003 x86/x64 or Windows 2008 x86/x64
– 1,5 GB (2 GB 2008)

Software Requirements:
– NET Framework 3.5 SP1
– Windows Installer 4.5
– Microsoft Office Word 2007 or Word 2003 SP2
– MIcrosoft Office Excel 2007 or Excel 2003 SP2
– SQL Server 2008 Express Edition, SQL Server 2008, or SQL Server 2005

image image
image image

Download Microsoft Assessment and Planning (MAP) Toolkit HIER

Microsoft Enterprise Desktop Virtualization (MED-V) 1.0 SP1 – now available for Windows 7

There is a new version of MDOP: MDOP 2010 refresh. MDOP 2010 includes:
– Microsoft Enterprise Desktop Virtualization (MED-V) 1.0 SP1 – now available for production deployment on Windows 7
– Microsoft Application Virtualization (App-V) 4.6 – localized client versions and additional languages support

Existing MDOP customers can download the MDOP 2010 Refresh at the Volume Licensing Service Center (VLSC).  For evaluation, MDOP 2010 Refresh can be downloaded from MSDN and TechNet.

What’s new in MED-V 1.0 SP1?
– Support for Windows 7 hosts – 32-bit and 64-bit
– MED-V server support for Windows Server 2008 R2
– Support for Japanese Windows versions

500 Medewerkers over naar Windows 7

Enige tijd geleden kwam er een Artikel op Techworld te staan dat ze op zoek waren naar personen die bezig waren met een Windows 7 Migratie. Bij een klant waar ik momenteel gedetacheerd zit ben ik hier druk mee bezig. Dus voor de fun maar ingeschreven en uit eindelijk een telefonisch interview gedaan.
Ik wist dat ze zouden gaan plaatsen in Windows 7 migratie boekje die je krijgt op het Techworld Windows 7 Migratie Seminar. Waar ik ook aanwezig ben. Ik wist nog niet dat ze het online zouden plaatsen. En vandaag zie ik in Feedreader mijn artikel voor komen 🙂

image

MDT 2010 Health Care

MDT 2010 Health Care is een samenvatting van best practices voor het aanpassen,  bouw en migreren, en beveiligen van Windows XP, Windows Vista of Windows 7 machines. Ook wordt hier kort beschreven hoe men applicaties kan uitrollen (scripted installs,silent installetie, application packages) als onderdeel van de uitrol. Het gaat om het uitrollen van een standaard desktop voor gemeenschappelijk gebruik. Tevens wordt besproken hoe men de gegeven van een gebruiker mee kan nemen naar de nieuwe werkplek.

Handleidingen:
Healthcare Desktop User State Migration Guide
Automated Build Application Integration Guide
Healthcare MDT 2010 Administrators Guide
Automated Build Healthcare Desktop and Server Guide

Downloaden van de MDT HealthCare doe je hier: MDT HealthCare

Installatie:

 image image
image image
image image

Voorbeeld wat Health Care automatisch aanmaakt:

image

disable auto-update notification in Flash Player in a domain

Je wilt dat Flash Player niet meer checkt of dat er een nieuwe versie is.Met het volgde installatie script wordt automatisch update van Flash Player uitgezet.Werkt op Windows 7 x86 & x64.

FlashInstall.cmd
msiexec "install_flash_player_10_active_x.msi" /qb!
COPY mms.cfg %WINDIR%\system32\Macromed\Flash /y
COPY mms.cfg %WINDIR%\SysWOW64\Macromed\Flash /Y

MMS.CFG
AutoUpdateDisable=1

Windows 7 Sysprep

Benodigdheden:

Laatste versie van WAIK : KB3AIK_EN.iso Version 1.0
Windows 7 Machine

ISO of DVD van Windows 7 (x86 of x64)

1. Open Windows System Image Manager
clip_image002

2. Open de install_Windows 7 ENTERPRISE.clg deze vindt op DVD/ISO onder Sources
clip_image004

3. Ga naar File New Answer File
clip_image006

4. Ga naar File à Save Answer File à Ik noem bestand het unattend.xmlclip_image008

5. Overzicht instellingen

Overzicht instellingen
1 WindowsPE

Niks

2 OfflineServicing

Niks

3 Generalize

Niks
4 Specialize

x86_Microsoft-Windows-Security-SLC-UX_neutral

SkipAutoActivation: true

X86_Microsoft-Windows-Shell-Setup_neutral

Computer Name: * (Randomly generated name, use this to test)
CopyProfile: false (Werkt niet)
Registered Organization: Microsoft (laten staan)
Registered Owner: AutoBVT (laten staan)
ShowWindowsLive: false
TimeZone: W. Europe Standard Time

5 AuditSystem

Niks

6 AuditUser

Niks

7 OobeSystem

x86_Microsoft-Windows-International-Core_neutral

InputLocale: nl-us
SystemLocale: nl-us
UILanguage: nl-us
UserLocale: nl-us

x86_Microsoft-Windows-Shell-Setup_neutral

RegisteredOrganization: Bedrijfsnaam
RegisteredOwner: Bedrijfsnaam

x86_Microsoft-Windows-Shell-Setup_neutral component à OOBE:

HideEULAPage true
NetworkLocation: Work
ProtectYourPC: 1

6. Overzicht
clip_image010

7. Disable Windows Media Player Networking Sharing Service

8. Zorg dat je geen overbodige Partitie’s hebt zoals oude recovery partitie

9. CMD prompt als administrator: net user administrator /active:yes

10. Kopieer unattend.xml naar C:\windows\system32\sysprep. Even show hidden files & system files aan zetten.

11. Open command prompt en ga naar C:\windows\system32\sysprep

12. Voer het volgende commando in: sysprep /generalize /oobe /shutdown /unattend unattend.xml

Windows 7 GPO Wallpaper

Windows 7 heeft een bug met het zetten van een Wallpaper in een gpo.
Hiervoor heb je twee oplossingen

Oplossing 1
Onder Group Policy Preferences moet je een registry key aanmaken met daarin de link naar de achtergrond.

image

en tevens moet ook nog de volgende policy ingesteld worden

image image

Oplossing 2:
Is het vervangen van default achtergrond die Windows 7 heeft en gelinkt wordt wanneer een nieuwe user op de desbetreffende pc inlogt. Dit scriptje heb ik in MDT gehangen.

Scriptje:
takeown /F c:\Windows\Web\Wallpaper\Windows\img0.jpg
echo y| cacls c:\Windows\Web\Wallpaper\Windows\img0.jpg /E /G “administrator”:F
echo y| cacls c:\Windows\Web\Wallpaper\Windows\img0.jpg /E /G “users”:R
copy “Z:\Applications\Algemeen\img0.jpg” “c:\Windows\Web\Wallpaper\Windows\img0.jpg” /Y

Update 07-12-2010
Microsoft released a fix for this problem. Check out 

http://support.microsoft.com/kb/977944

Translate »