Creating a Self-Signed SSL Certificate met MakeCert.exe

Waar vind je certificaten op je PC

Ik begin even met de basis Als u toepassingen gaat ontwikkelen die certificaten vereisen, zult u moeten weten waar de certificaten worden opgeslagen, evenals hoe te om de beheersinterface te navigeren. Er is een MMC (Microsoft Management Console) op elke pc aanwezig. Vanuit deze management console kunt u certificaten beheren. Certificaten kunnen opgeslagen worden worden onder Gebruikers Account of op de lokale Machine Opslag.

Voer de volgende stappen uit om Certificaten te laden uit de lokale computer account. Certificaten Management Console Openen.

1. Start à Uitvoeren

2. MMC

3. Bestand à Module Toevoegen / Verwijderen

4. Toevoegen

5. Certificaten

6. Computeraccount

7. De lokale PC waar deze wordt op uitgevoerd. à Voltooien

8. Sluiten à Ok
clip_image002

Je kunt de certificaten management console opslaan. Dit doe je op de volgende manier.
Bestand à Opslaan Als à Noem het certificaten.msc.

Sla het bestand bijvoorbeeld op je Desktop.

Als je Certificaten uit klikt (Lokale Gebruiker, Lokale Computer). Dan zie je certificaten opslagen

Personal. Here you store certificates for which you have the associated private key.

Trusted Root Certification Authorities. This store lists the Third-Party Root Certification Authorities (Thawte, Verisign, etc.), Microsoft root certificates, and your own root certificates for self-signed certificates.

Trusted People. Here you place your trusted certificates (you must also trust the entire chain of certificates).

Hoe kan ik mijn eigen test ssl certificaten aan maken voor websites of voor overige web diensten om het te beveiliging.

Dit is de meest gevraagde vraag die ik heb gehoord. Het is niet altijd gemakkelijk om een beknopte lijst van stappen te vinden om voor het creëren van certificaten te volgen. Er zijn drie populaire benaderingen van het produceren van certificaten voor testende doeleinden:

1.     Vraag een testcertificaat bij een certificaatgezag (CA), zoals Verisign. Deze zijn meestal 90 dagen geldig.

2.     Verstrek CA. uw eigen certificaten van uw Server 2003 Certificaat Server.
http://www.petri.co.il/install_windows_server_2003_ca.htm
http://www.petri.co.il/obtain_digital_certificate_from_online_ca.htm

3.     Produceer certificaten gebruikend makecert.exe.
4. Maak een Self-Signed Certificate gebruik makend van de SSL Diagnostics Tool

Het makkelijkste is makecert.exe te gebruiken. Dit hulpmiddel wordt geïnstalleerd tijdens de installatie van .NET Framework SDK (2.0 en 3.0 beide bevat makecert.exe).

MSDN verteld hoe u certificaat kunt maken (zie http://msdn2.microsoft.com/en-us/library/bfsktky3.aspx).


Het creëren van een SSL Certificaat

Om een Self-Signed SSL Certificate te creëren kunt u het volgende commando makecert.exe gebruiken.

makecert -r -pe -n "CN=www.wardvissers.nl" -b 01/01/2000 -e 01/12/2036 -eku 1.3.6.1.5.5.7.3.1 -ss my -sr localMachine -sky exchange -sp "Microsoft RSA SChannel Cryptographic Provider" -sy 12 c:localhost.cer

The subject name “localhost” makes it possible to browse without errors to http://localhost or any path relative to it. The subject name of the SSL certificate must match the domain or machine name used in the path to access the site. If you used your machine name to browse to Web sites on your machine, for example http://idesign/, you’d create the certificate with the subject name “CN=idesign”. Best use is enter de FQDN like: webmail.wardvissers.nl


makecert.exe opties

Hier onder staat een lijst met opties om een goede Self-Signed SSL Certificaten te maken.


Option

Description

-n certName

The subject name for the certificate. This is a distinguished name following the X.500 specification. It can be as simple as “CN=localhost” or include a richer description of the subject with “CN=localhost, O=IDesign, OU=Architecture, E=mlb@idesign.net”.

-pe

This allows the private key to be exported after generating it. It is a good idea to generate the private key pair and export the certificate to apply password protection, even if it is a test certificate.

-sr

Certificate store location where the key will be generated. It doesn’t matter which store you choose, because you will likely export the key pair, password protect it, and then import it to the correct store for use. Values can be currentuser or localmachine.

-ss

Which logical store will the certificate be installed in? Specify “My” here; this will place it in the Personal logical store.

-sp

The cryptography provider to use. A list of possible providers can be found here: http://windowssdk.msdn.microsoft.com/en-us/library/ms731160.aspx. The “Microsoft RSA SChannel Cryptographic Provider” is not subject to government restrictions for usage.

-sy

Cryptography provider type; an integer representative of the provider setting for the -sp option. Use the value 12 for the “Microsoft RSA SChannel Cryptographic Provider”.

-r

Indicates a self-signed certificate.

-sky certType

Can be signature or exchange. Use exchange for SSL and secure messaging.


Het uitvoeren van het Certificaat

De bedoeling is om .pfx (Certificaat + Wachtwoord) en een cer op te slaan voor later gebruik.

De .cer heb je al opgeslagen tijdens het aanmaken van het certificaat.
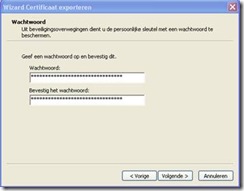
Via de Certificaten console kun je .pfx bestand exporteren.

Hoe je dat doet zie je hieronder:

RechterMuis op het Certificaat en dan Alle Taken à Exporteren

clip_image004
clip_image006

clip_image008

clip_image010

clip_image012

clip_image014

clip_image016
clip_image018
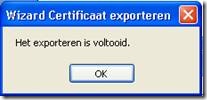
Voorbeeldje van de melding die je krijgt.

clip_image019

VMware Server 2.0 Tips and Tricks


Hierbij sommige  Tips & Tricks van VMWare Server 2.0

1. Use a web browser (Firefox and Internet Explorer are the two officially supported ones) to
connect to http://yourserver:8222 or https://yourserver:8333 if you selected the default
ports during installation/configuration.

2. If you manage from a Windows client then the VI (Virtual Infrastructure) client is also
available which is what is used to manage ESX/ESXi and Virtual Center too. It is available at
https://yourserver:8333/client/VMware-viclient.exe.

3. The VI Client cannot add USB devices to VMs running at hardware versions greater than 4 –
version 7 is required for USB 2.0 support.

4. Specify yourserver:8333 for the connection in the VI Client.

5. The credentials you specify to logon are admin credentials that you would use on the host
even without VMware installed – VMware does not introduce any credentials/accounts
itself.

6. The admin account you use must have a password defined for it or you will not be able to
login.

7. The remote console is a locally installed application which will be installed when the console
tab is first clicked onto.

8. For remote management through firewalls, VPNs or over SSH tunnels, port 902 is also used as well as 8222/8333. Note that during Linux configuration; you may have selected a
different port from 902 as sometimes it can be statically detected as being in use.

9 .Backing up VMs can be achieved in a number of ways:
a. If the VM is not powered up then simply copy all of its files to another location.
b. If the VM is running, take a snapshot and then copy the base disk file(s) to another
location (*.vmdk except *-00001*.vmdk). A new VM can then be constructed using
this disk. Note that you can only have a single snapshot.
c. In a Windows VM, use a VSS (Volume Shadow copy Service) aware backup tool to
create a backup that can then be restored using the same tool to a bare VM.
d. On a Windows host, use a VSS aware backup tool to backup the files that constitute
the VM.

10. If a VM fails to power on and was not shut down properly, check for .lck files/folders and
remove them if they exist as long as the VM definitely is not running.

11. Server 2.0 stores VMs in datastores – a default datastore is created which is calle
“[standard]” and will map to the root of the folder you select during installation.

12. VMs can be run from external USB drives by defining a datastore for the mount point.

13. Remote datastores can also be added – NFS for Linux hosts and CIFS/SMB for Windows.

Bekijk HIER de volledige PDF met Tips & Tricks van VMWare Server 2.0

VMware vCenter Converter vrij gegeven

clip_image001

VMware vCenter Converter kan op heel verschillende hardware en de meest gebruikte versie van Microsoft Windows and Linux* operating systems. Met dit robuste , enterprise class migratie tool kun je het volgende :

· Quickly and reliably convert local and remote physical machines into virtual machines without any disruption or downtime.

· Complete multiple conversions simultaneously with a centralized management console and an intuitive conversion wizard.

· Convert other virtual machine formats such as Microsoft Virtual PC and Microsoft Virtual Server or backup images of physical machines such as Symantec Backup Exec System Recovery or Norton Ghost to VMware virtual machines.

· Restore VMware Consolidated Backup (VCB) images of virtual machines to running virtual machines.

· Clone and backup physical machines to virtual machines as part of your disaster recovery plan.

clip_image003

Downloaden doe je hier: https://www.vmware.com/download/converter/

*Linux P2V ondersteuning is alleen voor de stand alleen versie alleen

Windows 2008 Core Read Only Domain Controller Script

1. Enter the productkey:
slmgr.vbs -ipk xxxxx-xxxxx-xxxxx-xxxxx-xxxxx

2. Activate:
slmgr.vbs -ato

3. Show activation:
slmgr.vbs -dli

4. Rename the computer:
Netdom renamecomputer WIN-???????? /newname:W2K8RDC01 /reboot:15
(use the command set to view all the variables used by Microsoft Windows)

5. Show all network interfaces:
Netsh interface ipv4 show interface

6. Set a static IP address:
Netsh interface ipv4 set address name=2 source=static address=xxx.xxx.xxx.xxx mask=255.255.255.0 gateway=xxx.xxx.xxx.xxx
(make sure that you’re choosing the right network interface. In this example it’s 2, so name=2 it means interface 2)

7. Set a static DNS server:
Netsh interface ipv4 add dnsserver name=2 address=xxx.xxx.xxx.xxx index=1

8. Turn Remote Desktop (RDP) on:
Cscript %windir%system32SCRegEdit.wsf /ar 0

9. Enable Remote Desktop (RDP) in the Windows Firewall:
netsh advfirewall firewall set rule group=”remote desktop” new enable=yes

10. Enable Remote Management (RemoteCMD) in the Windows Firewall:
netsh firewall set service type=remoteadmin mode=enable 

11. Join the domain:
Netdom join W2K8RDC01 /domain:adtest.local /usero:administrator /passwordo:*
(This step is only for joining a member server to the domain. For a Domain Controller go to step 12)

12. Preparing the promotion to a Read Only Domain Controller:
We need to create a unattend.txt that we are going to use by the DCPROMO. So let’s create a new textfile, type notepad

13. Making the unattended.txt:
Copy and past the following test into the new textfile and save this file on the C: drive of the Core Server.

==================================================
[DCInstall]
InstallDNS=Yes
ConfirmGc=Yes
CriticalReplicationOnly=No
DisableCancelForDnsInstall=No
RebootOnCompletion=Yes
ReplicaDomainDNSName=adtest.local
ReplicaOrNewDomain=ReadOnlyReplica
ReplicationSourceDC=win2k8dc01.adtest.local
SafeModeAdminPassword=******************
SiteName=Default-First-Site-Name
UserDomain=adtest.local
UserName=administrator
Password=******************
RebootOnCompletion=Yes
==================================================
14) Run the DCPROMO
dcpromo /unattend:c:unattend.txt

Windows 2008 Core Configurator Download


Ik vond een nice tooltje om Windows Core mee te configureren. Het tootlje is gemaakt door voormalig MVP Guy Teverovsky. Het tooltje heet dan ook Core Configurator.
Hij geeft dit tooltje gemaakt in prive tijd maar dit heeft dit van zijn voormalige werkgever of line moeten halen. Zie het verhaal hier.

Hoezo voor malig MVP: Hij heeft zijn MVP Titel moeten inleveren toen hij voor Microsoft ging werken in Isreal.

Downloaden:
CoreConfigurator.cab
Coreconfigurator.zip

En zo ziet het tooltje er uit:
coreconfigurator

Understanding Microsoft Virtualization Solutions from Desktop to Datacenter

Microsoft heeft een gratis E-book ter beschikking gesteld waarin verteld wordt over de laatste virtualisatie producten en hoe deze te plannen, implementeren en te managen.

De technieken waarover gesproken worden zijn: Windows Server 2008 Hyper-V, System Center Virtual Machine Manager 2009, Microsoft Application Virtualization 4.5, Microsoft Enterprise Desktop Virtualization, and Microsoft Virtual Desktop Infrastructure.

image 

Downloaden van het boek doe je HIER

VMWare Toolkit 1.5

PCLI_BlogVMWare heeft VMWare toolkit 1.5 vrij gegeven.
Bekijk HIER de release notes.
Er zijn 32 nieuwe powershell commando’s bij gekomen. Een heleboel zijn uitgebreid en gefikst.
Downloaden doe je HIER

Bekijk ook de volgende Video’s:
HA and DRS in VI Toolkit 1.5
Managing Storage with VI Toolkit 1.5
Some important fixes in VI Toolkit 1.5
Get-Stat Improvements in VI Toolkit 1.5
Resizing Guest Disks with Invoke-VMScript

image

Deploying Windows Server 2003 R2 using MDT 2008

1. Voeg in MDT onder Operating System de Windows 2003 R2 CD1 toe.
Maak hier voor ook gelijk een Task toe.
Locatie in mijn geval:
D:DistributionOperating SystemsWindows Server 2003 R2 Enterprise SP2 Eng x86

2. Maak de volgende structuur lijkend op deze
D:Distribution
-Operating System
–Windows Server 2003 R2 Enterprise SP2 Eng x86
—$OEM$
—-$1
—–R2

3. Van de Windows Server 2003 R2 CD2, kopieer de CMPNENTS map naar D:DistributionOperating SystemsWindows Server 2003 R2 Enterprise SP2 Eng x86$OEM$$1R2

4. In de OEM$$1R2 map maak een batch bestand aan genaamd InstallR2.cmd (met de onderstaande tekst er in)

reg add HKLMSoftwareMicrosoftWindowsCurrentVersionSetup /v SourcePath /t REG_SZ /d C:WindowsSourcei386 /f
reg add HKLMSoftwareMicrosoftWindowsCurrentVersionSetup /v ServicePackSourcePath /t REG_SZ /d C:R2CMPNENTSR2 /f
C:\R2CMPNENTSR2setup2.exe /q /a /sr

Opmerking: Er zijn 3 regels. Regel 1 & 2 beginnen met  "reg", regel 3 begint met "C:R2".

4. Pas de Windows Server 2003 R2 X86 Task Sequence aan.
Pas de [GUIRunOnce] sectie in Unattend.txt aan zoals het hier onderstaat:
[GUIRunOnce]
    "C:R2InstallR2.cmd"
    "cscript.exe C:MININTScriptsLiteTouch.wsf /start"
    "cscript.exe D:MININTScriptsLiteTouch.wsf /start"
    "cscript.exe E:MININTScriptsLiteTouch.wsf /start"
    "cscript.exe F:MININTScriptsLiteTouch.wsf /start"

Opmerking: Wil je de melding Windows Server Post-Setup Security Updates scherm niet krijgen moet je onder staan regel gebruiken.

Option 1:

Set "HKLMSoftwareMicrosoftWindowsCurrentVersionServerOOBESecurityOOBEDontLaunchSecurityOOBE" to "0"

Option 2:

Wil je Windows Firewall uitgeschakeld hebben voeg deze regels dan toe in unattend.xml

[WindowsFirewall]
Profiles = WindowsFirewall.TurnOffFirewall

[WindowsFirewall.TurnOffFirewall]
Mode = 0

BRON

Outlook Contacts to vCard (vcf) files

Ik was aan het zoeken op een het internet naar tooltje wat mijn contacten kan exporteren in een keer naar vcf file’s.
Ik vond verschillende tooltjes maar geen een die gratis was.
Tot ik het vb script vond van Dave Moats. Het werkt als een trein.

Aanroep:
C:scripts>cscript exportContacts.vbs /p:C:scriptsoutlookContacts
Microsoft (R) Windows Script Host Version 5.6
Copyright (C) Microsoft Corporation 1996-2001. All rights reserved.

Ward.vcf
Mark.vcf

Script:
==========================================================
‘==     VB Script to Export Outlook Contacts to vCard (vcf) files
‘==
‘==           Copyright © 2008, Dave Moats
‘==
‘== This sample is provided ‘AS-IS’, without any
‘== express or implied warranty. In no event will the
‘== authors be held liable for any damages arising from
‘== the use of this sample code.
‘==
‘== Permission is granted to anyone to use this sample
‘== code for any purpose, including commercial applications,
‘== subject to the following restrictions:
‘==
‘== The origin of this code must not be misrepresented;
‘== you must not claim that you wrote the original code.
‘==
‘== If you use this code, an acknowledgment in the
‘== documentation is requested – shown below:
‘==
‘==             Portions Copyright © 2008,
‘==        Dave Moats (http://www.davemoats.com/).
‘==
‘==========================================================

‘==========================================================
‘== NOTE: watch for wrapped lines and html special
‘==        characters in the web representation of this
‘==        sample code
‘==========================================================

‘==========================================================
‘==
‘== exportContacts.vbs – a script used to export contacts
‘==                        from outlook and save them in
‘==                        vcf format
‘==========================================================
option explicit

‘==========================================================
‘== declare the local variables to be used
‘==========================================================
dim scriptName, namedArgs, folderPath

‘==========================================================
‘== get the name of the running script
‘==========================================================
scriptName = wscript.scriptname

‘==========================================================
‘== get the named command line arguments
‘==========================================================
set namedArgs = wscript.arguments.named

if not namedArgs.exists("p") then
   wscript.echo "Usage: " & scriptName & " /p:<output folder path> is required"
   wscript.echo "Example: cscript " & scriptName & " /p:c:path to the folder"
   wscript.quit
else
   folderPath = namedArgs.item("p")
end if

set namedArgs = nothing

‘==========================================================
‘== now call the subroutine that does all the work
‘==========================================================
exportToVCF folderPath, ".vcf"

wscript.quit

‘==========================================================
‘== sub exportToVCF – subroutine that connects to outlook
‘==                   and exports all contacts to the path
‘==                   specified in the exportPath argument
‘==========================================================
sub exportToVCF(exportPath, ext)
    ‘======================================================
    ‘== declare the local variables
    ‘======================================================
    dim outApp, fldContacts, contactEntry, exp

    ‘======================================================
    ‘== create the outlook object and then get the contacts
    ‘======================================================
    set outApp = createobject("Outlook.Application")
    set fldContacts = outApp.getnamespace("MAPI").getdefaultfolder(10)

    ‘======================================================
    ‘== here we are looping the entries in the contacts
    ‘== folder looking for contacts – when a contact is
    ‘== found it will be exported
    ‘======================================================
    for each contactEntry in fldContacts.items
       if typename(contactEntry) = "ContactItem" then

          dim tmpString, tmpArr, periodLocation, outPath

          tmpString = contactEntry.lastnameandfirstname
          ‘================================================
          ‘== creating the name of the vcf file based on
          ‘== the first and last name fields of the contact
          ‘================================================
          tmpString = replace( tmpString, "’", "" )

          tmpArr = split( tmpString, "," )

          if ubound( tmpArr ) <> 1 then
             wscript.echo tmpString & ext
             outPath = exportPath & "" & tmpString & ext
          else
             if tmpArr(0) = "com" then
                wscript.echo trim(tmpArr(1)) & trim(tmpArr(0)) & ext
                outPath = exportPath & "" & trim(tmpArr(1)) & trim(tmpArr(0)) & ext
             else
                wscript.echo trim(tmpArr(1)) & " " & trim(tmpArr(0)) & ext
                outPath = exportPath & "" & trim(tmpArr(1)) & " " & trim(tmpArr(0)) & ext
             end if
          end if
          contactEntry.saveas outPath, 6

       end if
    next
    ‘======================================================
    ‘== dumping the object references that were created
    ‘======================================================
    set fldContacts = nothing
    set outApp = nothing

end sub

Exchange 14 & De Mogelijkheden


Op Technet is een artikel geplaatst waar in Jim Lucy de nieuwe functie’s uitlegt van Exchange 14.

Jim verteld hoe Exchange 14 wordt in het Exchange Lab.
Momenteel worden er 3,5 miljoen mailboxen gehost in Exchange Labs.
Jim geeft ook een demo over gebruikers interface, zoals e-mail, kalender via Outlook en  de nieuwe webinterface. Tevens ook via je Windows Mobile telefoon. Dit is de eerste video uit een reeks die uit gaan komen.
Dus hopelijk binnen kort meer info van Exchange 14.

Bekijk hier de video.

Translate »